


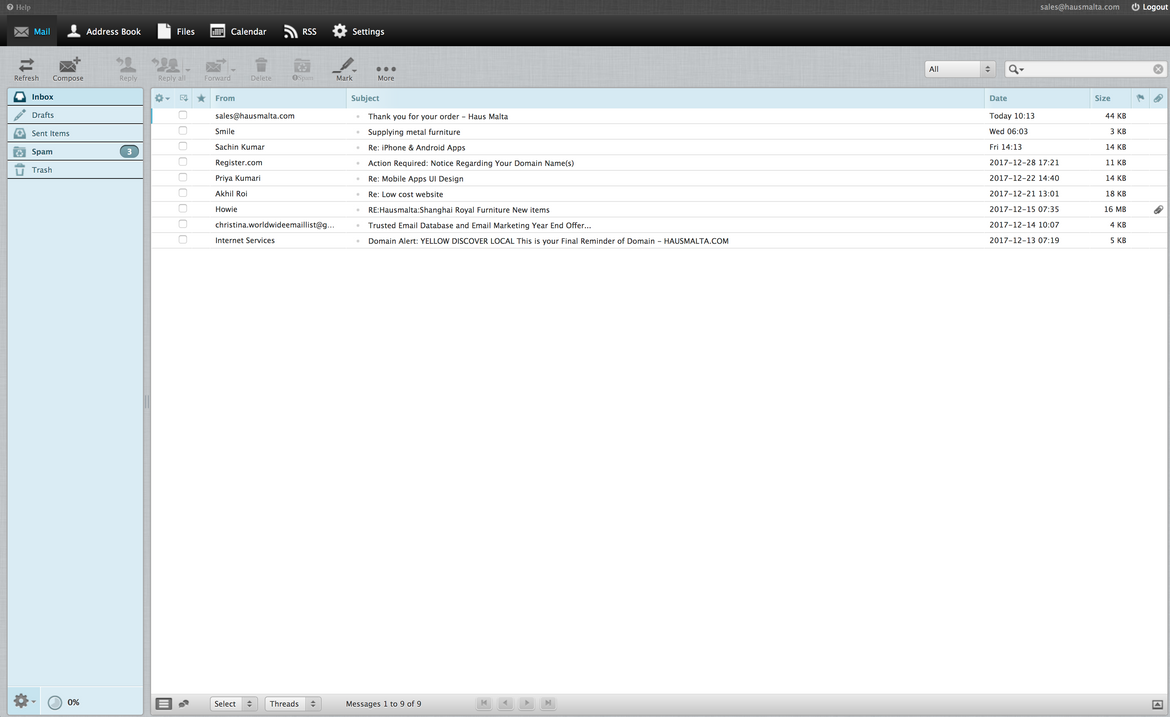
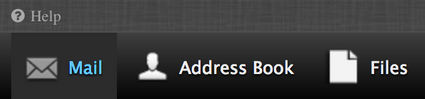
The Mail component provides you with access to essential email functions. You will be able to manage personal folders (Inbox, Drafts, Spam, Sent, and Trash), compose and read emails.
ADDRESS BOOK
You can add, group, manage, and delete contact information.
FILES
You can store and share up to 2000 files.

Email set up DETAILS:
All the emails bought from Yellow, will have an SSL domain.
IMAP
Server: mail.b.hostedemail.com
Port: 993
Username: full email address
Password: emailed password
POP (incoming)
Server: mail.b.hostedemail.com
Port: 995
Username: full email address
Password: emailed password
SMTP (outgoing)
Server: mail.b.hostedemail.com
Port: 465
Username: full email address
Password: emailed password
CONNECT YOUR ACCOUNT TO MAIL
First of all,
LOG IN TO YOUR MAIL ACCOUNT
MAIL >> Add Account
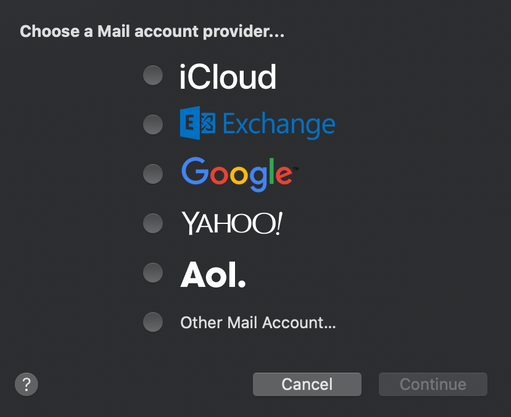
From the Mail tab add account
Other Mail account...>>
1. Insert e-mail address that you would like to add to the clients mail account
2. Username should be the same as the email address
3. Password is the password we created on mono
4.Account type -- Mail uses POP
5. Incoming mail server: mail.domain of client.com
6. Outgoing mail server: mail.domain of client.com
>> press sign in
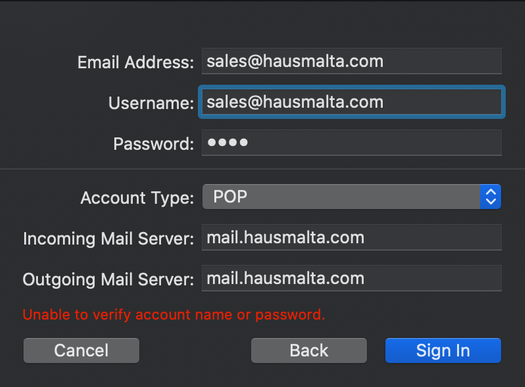
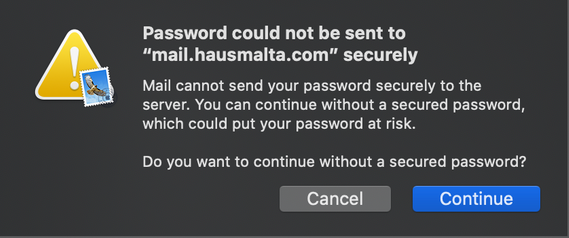
You will get the following error press ok (it will pop up again.. press ok)
Remember to change password in future.
DONE!
CONNECT YOUR ACCOUNT TO GMAIL
First of all,
LOG IN TO YOUR GMAIL ACCOUNT
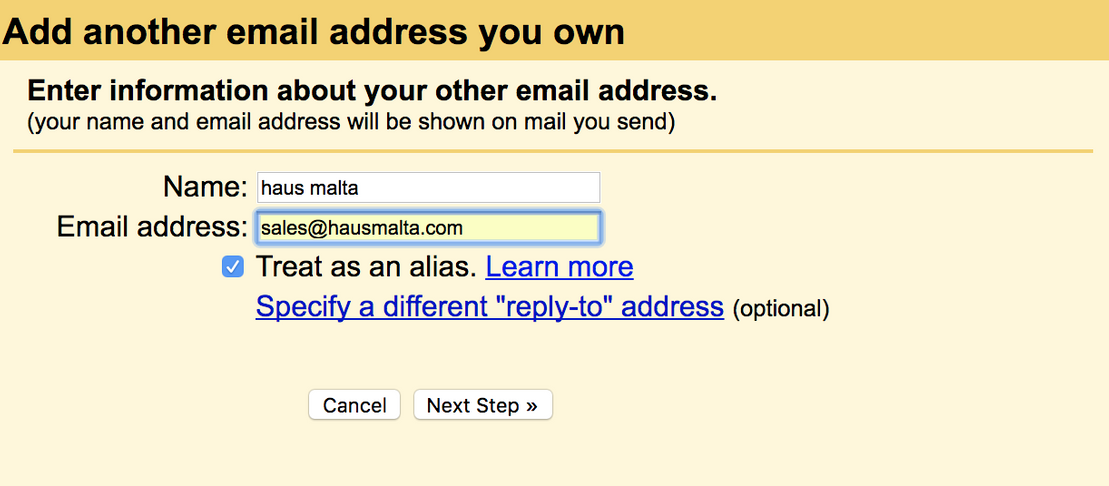
SEND EMAILS AS MAIL ADDRESS BOUGHT FROM GMAIL
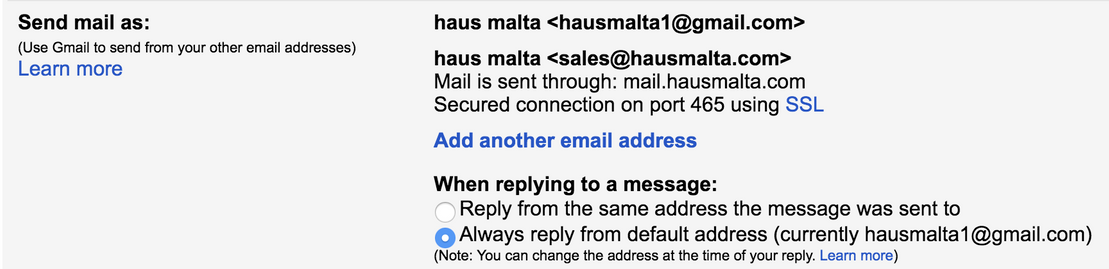
You will be able to send an email with the address purchased from Yellow, from your Gmail account.
ADD MAIL ACCOUNT TO GMAIL
You will be able to receive all the emails sent to the address purchased from Yellow, in your Gmail Account.
Below you can find the steps you have to follow to set up your Gmail account according to your preferences.

SEND EMAILS AS MAIL ADDRESS BOUGHT FROM GMAIL
NOTE: YOU CAN ONLY MOVE MESSAGES, NOT FOLDERS OR LABELS FROM YOUR OTHER ACCOUNT.
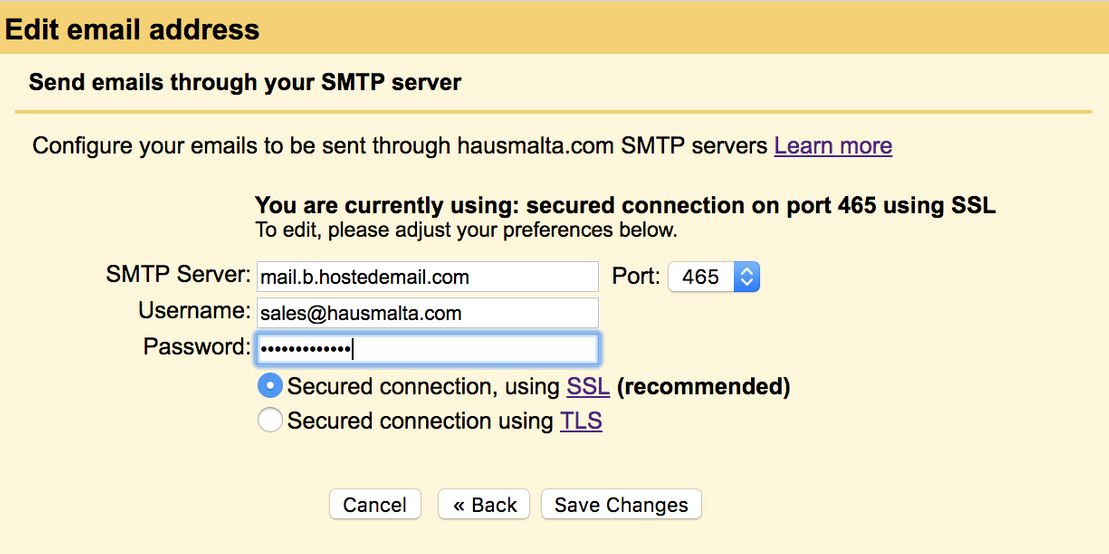
Step 4:
Configure your mail to be sent through your domain SMTP servers
Add details of the SMTP server provided
For example:
SMTP Server: mail.b.hostedmail.com
Port: 465
Username: sales@hausmalta.com (full email address)
Password: *password provided*
Tick Secured Connection, using SSL
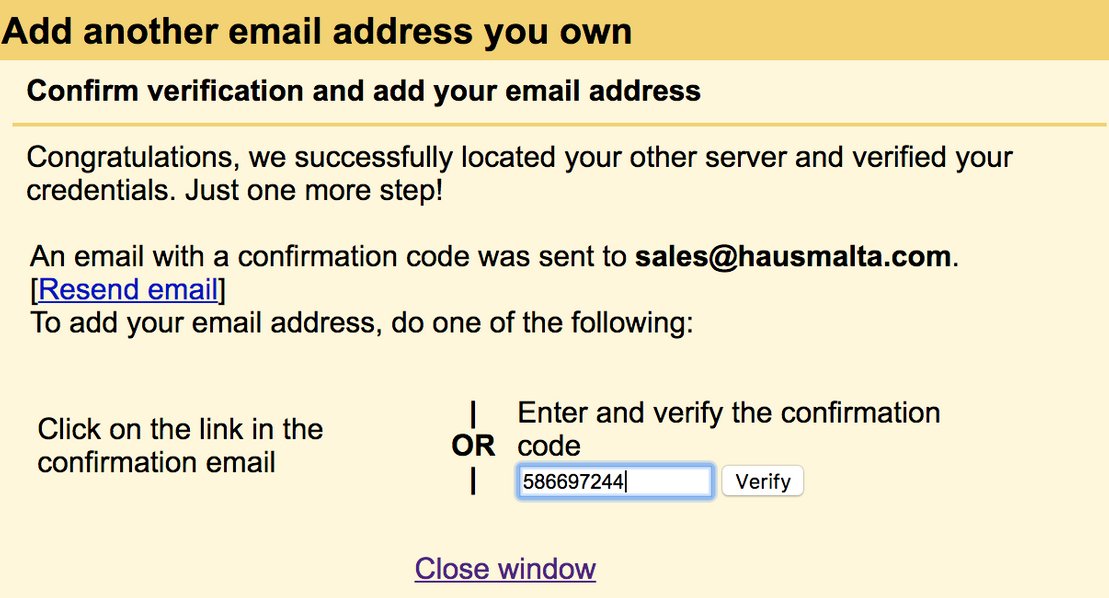
Step 5:
You will receive a confirmation code on your purchased email address.
Enter the code in the proper field and click Verify
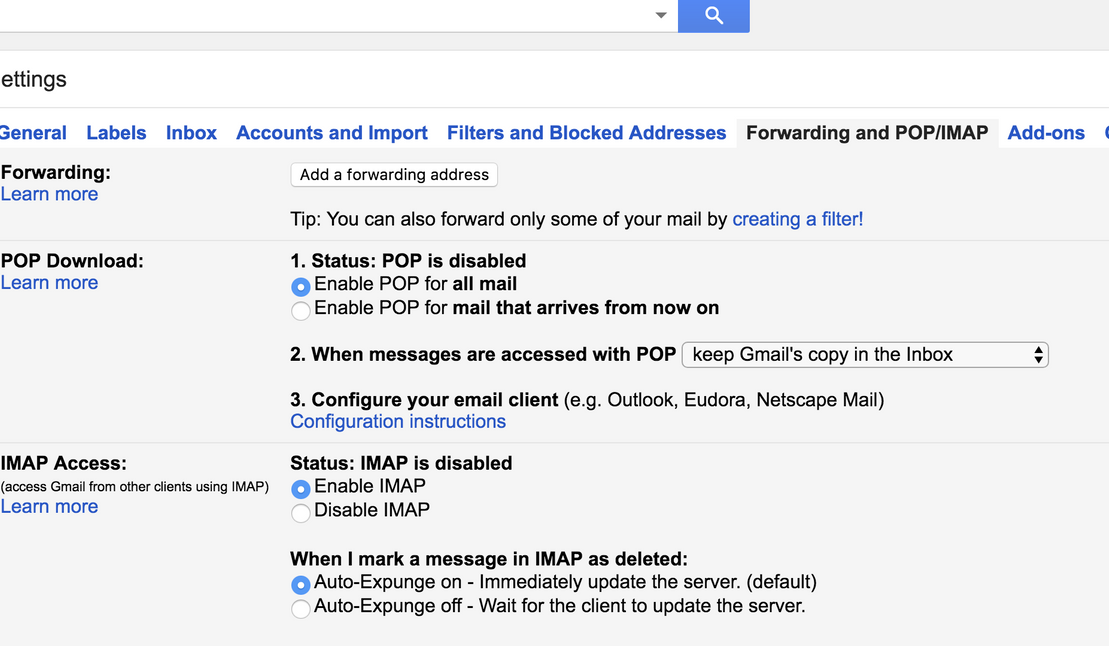
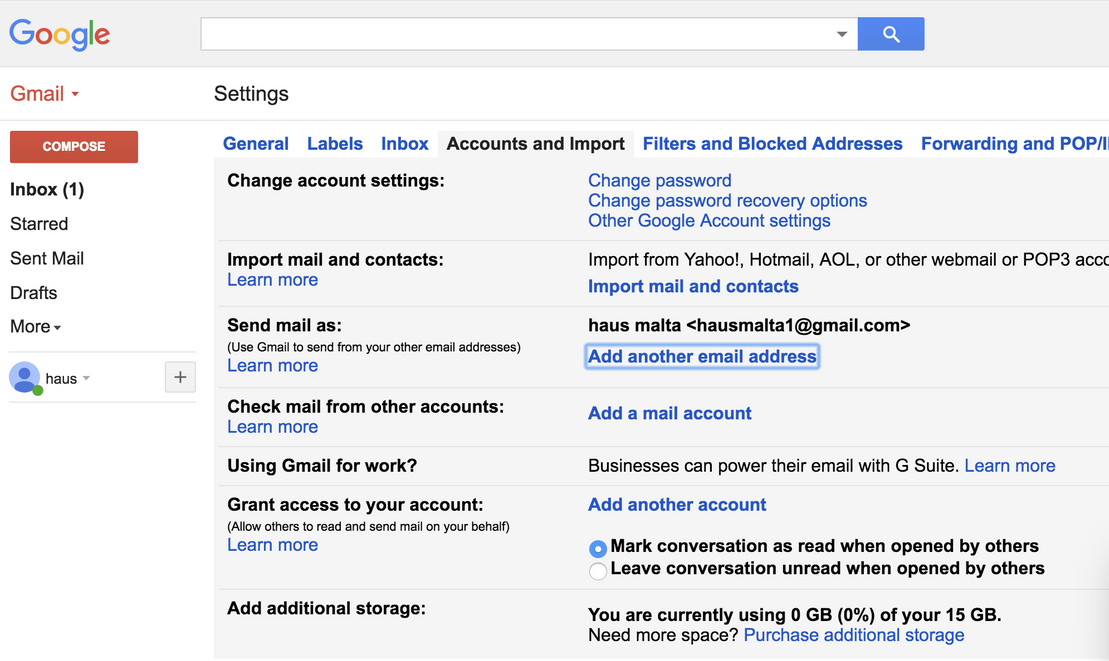
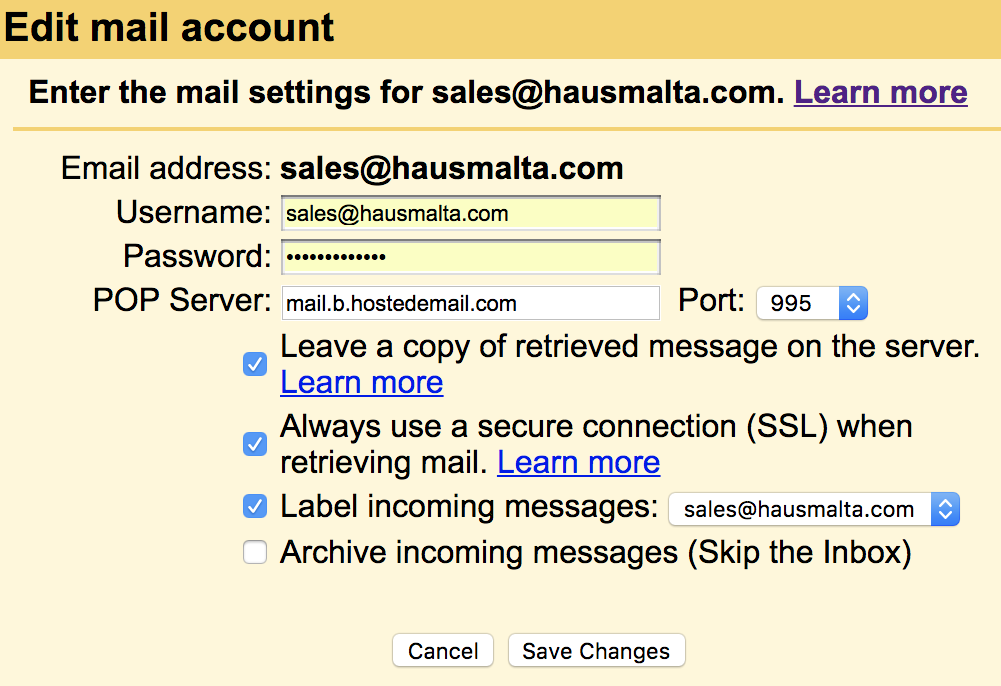
ADD MAIL ACCOUNT TO GMAIL
Step 1:
Settings > Accounts or Accounts & Import
Add full email address purchased

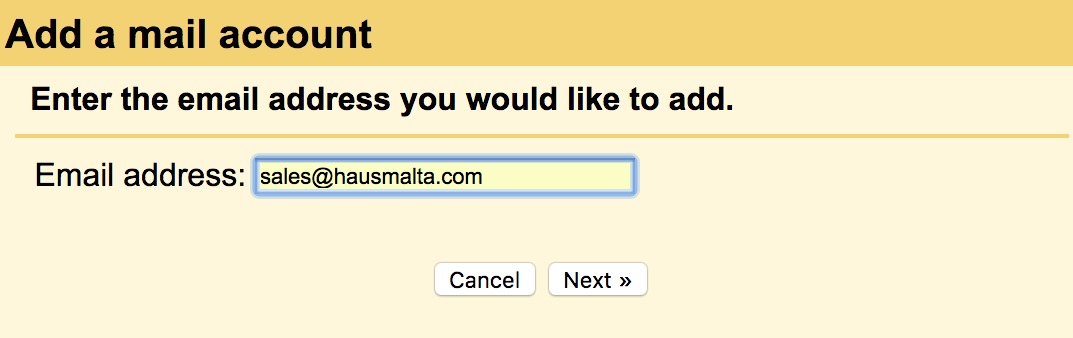
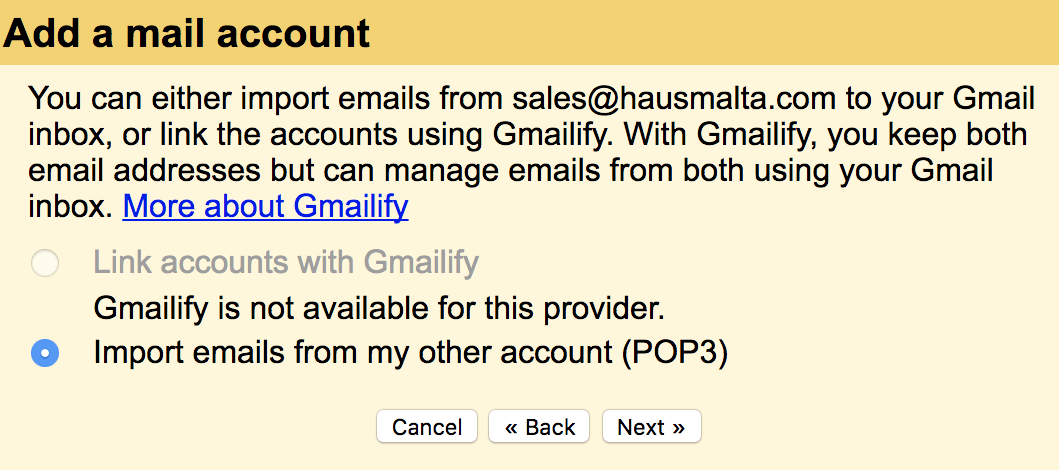
Step 3:
Enter the mail settings for you email purchased from Yellow with the Incoming POP3 details provided
For Example
Email address: sales@hausmalta.com
Username: sales@hausmalta.com
Password: *password provided*
POP Server: mail.b.hostedemail.com
Port: 995
Always use a secure connection (SSL) when retrieving mail
Select the options that apply to you.

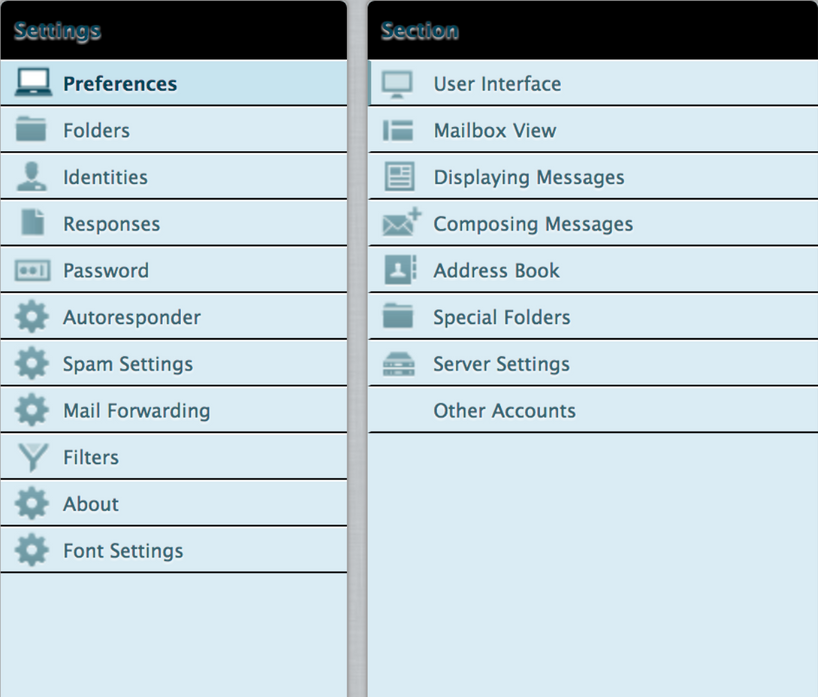
PREFERENCES
User Interface
Interface Settings (Language, Time zone, Time/date etc.)
Mailbox View
Work area settings
Displaying Messages
Display Message settings
Composing Messages
New Message settings
Address Book
Display settings of Address book
Special Folders
Create and manage Special Folders
Server Settings
Other Accounts
Add other accounts
FOLDERS
Add/Edit Folders
IDENTITIES
Set up email identity (Display Name, Email, Organisation & Signature)
RESPONSE
Add responses
PASSWORD
Edit Password
AUTORESPONDER
Set up an automatic email reply for a defined period
HELP
On the top-left of the window you can find the Help button.