
BLOG
Build a relationship with your clients!
A Blog is an essential and exciting feature to add to your website. The blog is used as a communication channel for your users.


VISIBILITY
Define the visibility of your post. The post could be shown on the blog for your visitors to read from a specific day onwards or it can be hidden.
TAGS
Organise and display your posts on your blog using tags relevant to the post and its content. Keep in mind that tags must be a single word or words with no spaces in between.
The tags may be viewed in the section under tags.
FEATURED IMAGE
The featured image will be the main image associated with the post.
AUTHOR
Add the name of the author of the post.
POST TITLE
Write a title relevant to your post.
PREAMBLE
The preamble is the first text that your visitors will see when reading your post. It is also the only text shown on the preview. Therefore, the preamble should be used as an introduction to the post.
CONTENT
Add the content and edit the style of your blog post.
DIFFERENT LANGUAGES
The editor offers you also the possibility to have the translation for each post in the different languages that your website supports. To do so, simply click on the language you wish to write in and complete the post title, preamble and content fields in the new language. The blog catalog will automatically display the posts in the language of the pages where it is included - e.g. by dragging a blog catalog into any Spanish page, the posts will automatically be displayed in Spanish.
ATTACHMENTs TAB
Click on Build > BLOG > Posts > Attachments
It is possible to include other files in the blog post by uploading them as attachments. These will be displayed at the bottom of the post.
GALLERY
In this section you can add other images that you wish to display other than the Featured Image.
CHANGE ORDER
Click on the three vertical dots at the bottom left corner of the preview > Drag the images to your preferred order.
EDITING & ALT-TEXT
By clicking on the small arrow icon at the bottom right corner of the miniature, a menu will expand with the Edit, Replace, Remove and Alt-Text options. In this section you can add your alt-text for search engines. Please note that if your website supports different languages you can have a different Alt-Text for each language.
DOWNLOAD
You can also add a download button at the end of your post.
BUTTON LABEL NAME
In this section you can change the button label. By default, the button label is "Download".
ADD FILE
In this section you must upload the file that will be associated with the button.
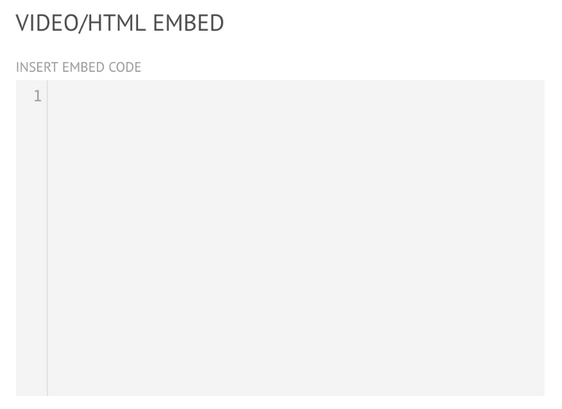
VIDEO/HTML MODULE
In this section you can add custom HTML to the post. Simply type down or paste the HTML snippet directly into the window.

SEO TAB
Click on Build > BLOG > Posts > SEO
It is possible to add SEO elements to each post, optimising it for a search engine.
TITLE & DESCRIPTION
By default, the title will be the same as the title of your blog post. The description will be the content part of your post. You can easily edit it by deleting or adding text in the box.
Note that on a search engine the description gets cut off after 160 characters. So, try to keep it interesting, brief and relevant to the blog post title you choose.
GOOGLE SEARCH RESULT PREVIEW TOOL
On the right side of the SEO tab you can see the Google Search Result Preview Tool. This allows you to preview how your post will be visualised on Google.
KEYWORDS
In this section, ADD the relevant keywords relating to your post.
PERMALINK
Create your own individual permalink for each post or let the editor generate one for you. The editor generates the permalink based on the post title.
301 REDIRECTS
If you already had blog posts on your website and wish to maintain their SEO value, it is possible to redirect the individual posts to their new pages. Simply type down in the field the directory part of the URL, only .

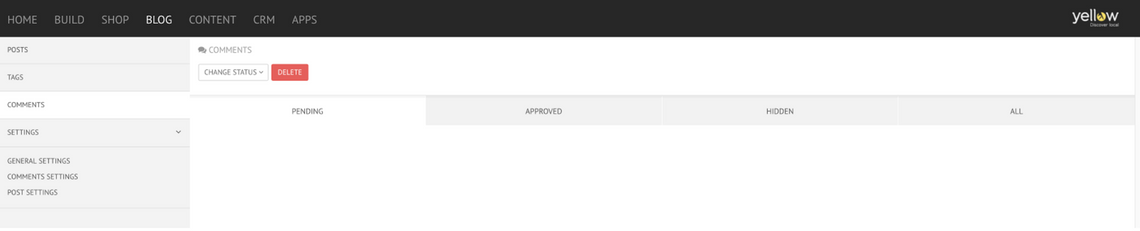
CHANGE STATUS
To change the status of a comment select the one(s) you wish to change by clicking on the tick box on the left of the comment title. Then, press the Change Status button.
DELETE
To delete one or more comments select the one(s) you wish to delete by clicking on the tick box on the left of the comment. Then press the Delete button.
PENDING
In case you have the auto approve of new comments setting disabled, when a visitor comments for the first time , it will appear in this section. The comment remains invisible in the comment section until your approval.
APPROVED
You can see all your approved or new comments in case you have the auto approve of new comments setting enabled.

GENERAL SETTINGS
Click on Build > BLOG > SETTINGS > General Settings
RSS FEED SETTINGS
By default, the RSS feed will use the Company name and description that you have defined in Global Data.
BLOG TITLE & DESCRIPTION
If you want to add a blog title and a description different from your Company name and description; type them down in these fields.
DIFFERENT LANGUAGES
In case your website supports different languages, you can add a different blog title and description for each language.


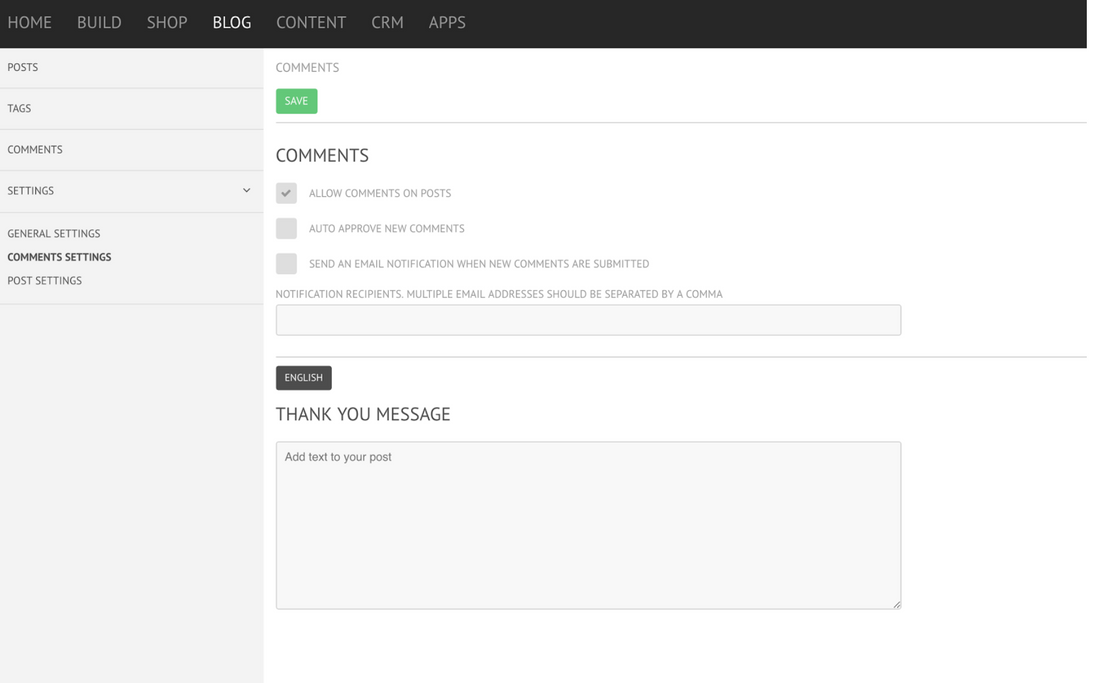
COMMENTS SETTINGS
Click on Build > BLOG > SETTINGS > Comment Settings
ALLOW COMMENTS ON POSTS
Visitors won't be able to comment when this setting is disabled.
AUTO APPROVE NEW COMMENTS
When this setting is disabled, all comments will be pending and invisible in the comment section until you have approved them. When the setting is enabled, all comments will be automatically approved and visible in the comment section.
SEND AN EMAIL NOTIFICATION WHEN NEW COMMENTS ARE SUBMITTED
If ticked, you will receive an email notification every time a new comment is submitted. The notification will be sent to the emails you define in the field below, in which you can add multiple recipients.
THANK YOU MESSAGE
By default, once a visitor has commented on your post, an automatic message saying "Your comment has been submitted" appears. You can personalise it and it is also possible to add different messages according to the language.
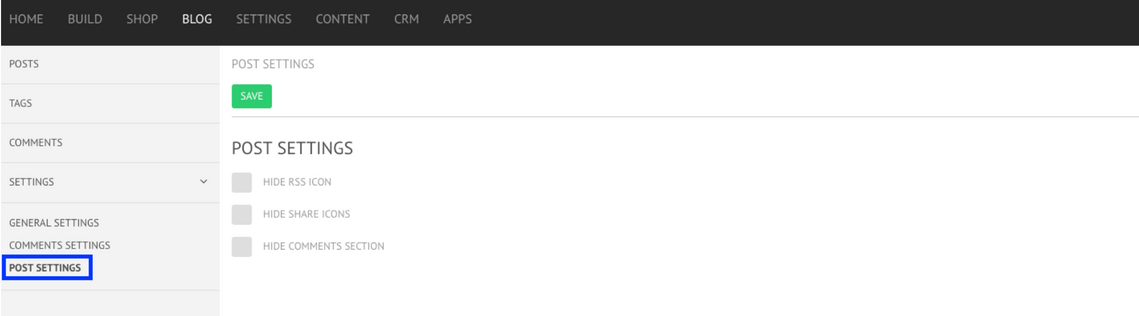
POST SETTINGS
Click on Build > BLOG > SETTINGS >Post Settings
HIDE RSS ICON
Activate this setting if you wish to hide the RSS icon. In such case visitors won't have access to the RSS feed.
HIDE COMMENTS SECTION
Activate this setting if you wish to hide the comments section. In such case visitors won't be able to see any existing comments or post a comment themselves.
HIDE SHARE ICON
Activate this setting if you wish to hide the share icons. In such case visitors won't be able to share your blog post on social media.