

Having a Facebook page for your business means:
Enhanced exposure
Prompt interaction with your clients
It’s not difficult at all to create a Facebook business page. All you need to do is sit down for just 5mins and Ta-Da! - your business is present online.
Step 1 : Sign up
Go to facebook.com/pages/create if you don’t have a Facebook account.
OR
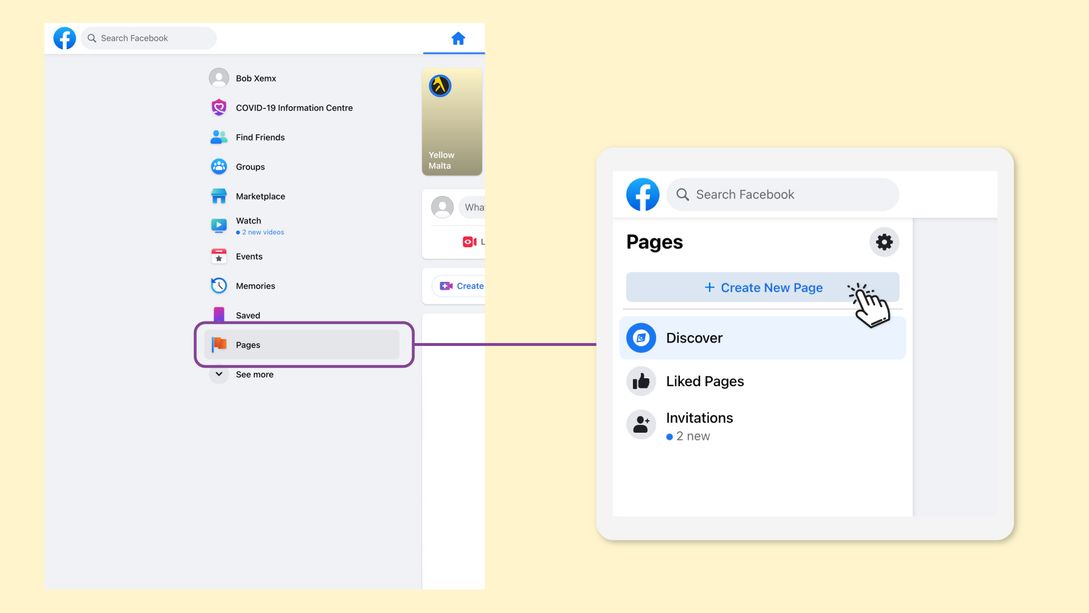
If you already have a Facebook account it’s easier. Just click on the Pages tab that’s on the left hand side in the Home.
Select + Create New Page
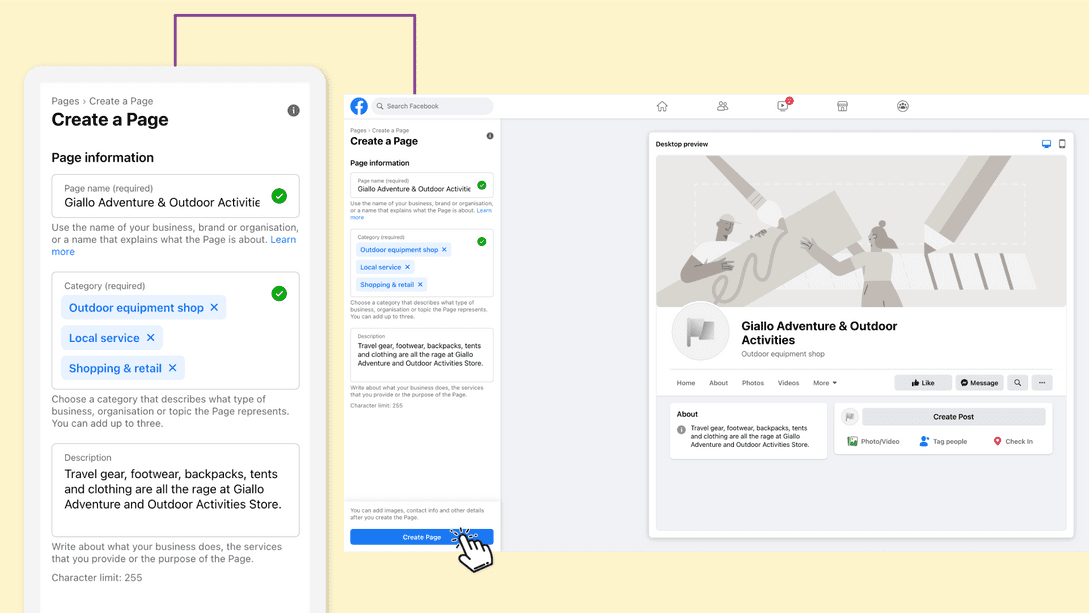
Step 2: Enter your business information
By filling in these 3 main fields you can start shaping your Facebook business page instantly!
Page Name - use the name of your business, brand or organisation
Category - choose up to 3 categories you wish that relate to your business and the content of your page. Alternatively, you can choose Local Service as a general category.
Description - write in short what your business is about, what services or products you offer or any other information you feel relevant to attract visitors. REMEMBER to keep it short and simple without exceeding 255 characters!
Click Create Page
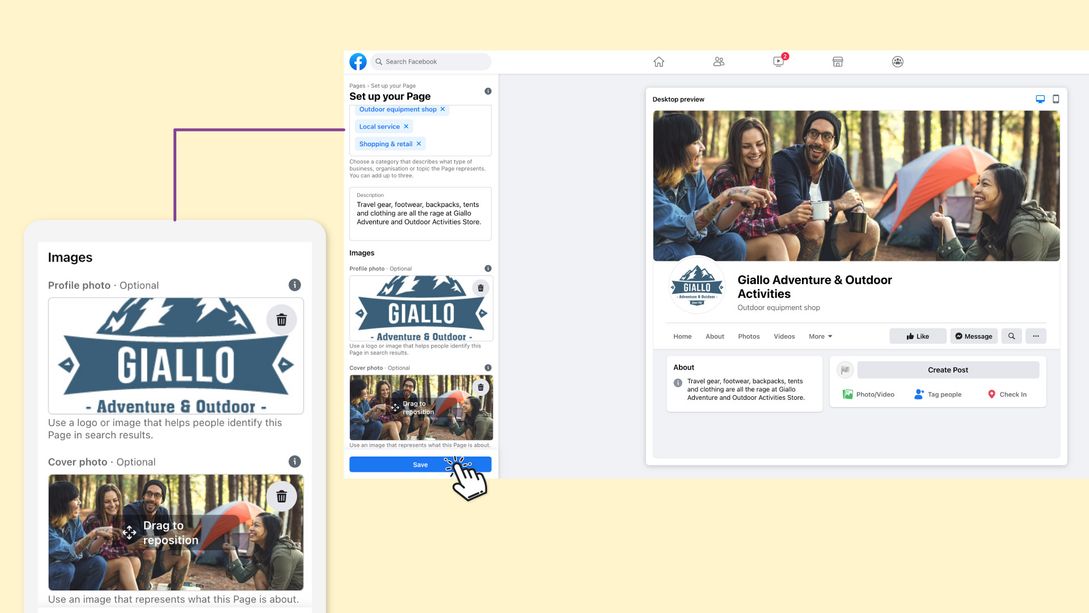
Step 3: Add Images
Adding that pop of colour with images in completing your business page look.
The Profile Photo
Click on Add Profile Picture and choose a saved image from a folder on your PC
Tip: insert your brand or business logo here (and try going for a size of 170 x 170pixels for the best fit)
The Cover Photo
Click on Add Cover Photo and choose a saved image from a folder on your PC
Tip: insert an attractive image here (and try going for a size of 1,640 x 856pixels for the best fit)
Click Save
Note: The images you choose initially can always be changed whenever you wish, even after you’ve created the business page.
Step 4: Create the username
With the unique username you create for your business, people will easily find it when searching for it on Facebook.
Tip: keep it short and easy to remember
Click on Create @username (found beneath the business page name)
Enter a name
Click on Create Username

Step 5: Add more information
The more information you add, the more you’ll be able to boast of a structured and comprehensive business page for all prospective visitors/clients.
What can you add?
- Website - if you have website, Click on Add Website and insert the domain
- Location info - if you have a physical shop, Click on Add Location Info to insert the address
- Business hours - to let people see your business hours, Click on Add Hours and input them accordingly
- Phone Number - click on Add Phone Number if you wish that clients contact you by phone. REMEMBER to insert Malta’s Country Code +356
- Messaging Preference - click on Connect WhatsApp if you prefer that people get in touch with you through WhatsApp
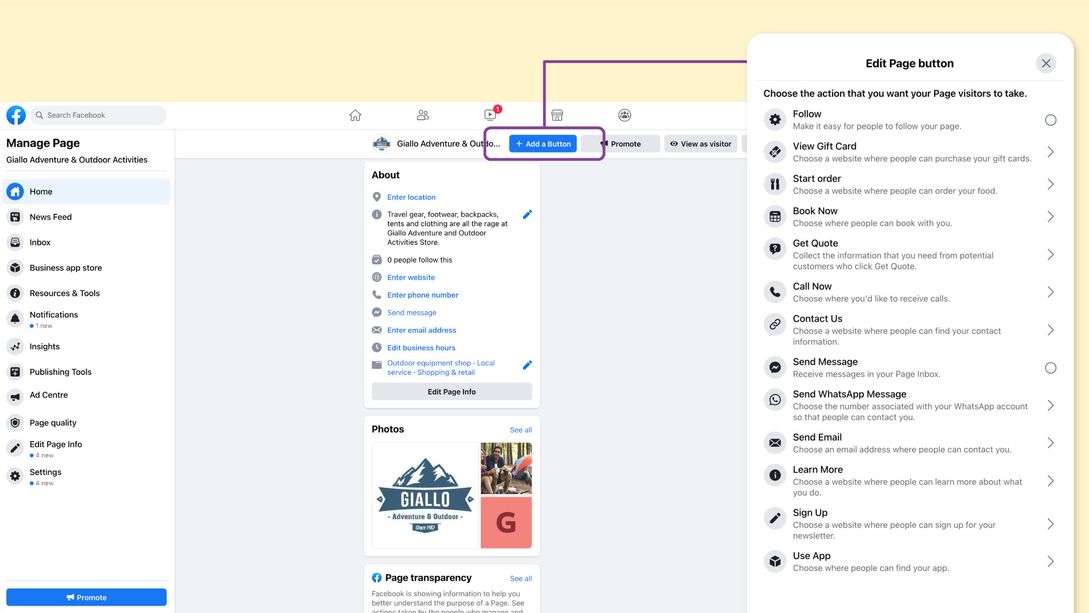
- Add a Page button - for even easier interaction with your business, click on Add Button for a selection of interactive buttons to choose from for people to use everytime they want to connect with you
The Action Button you choose is instantly visible at the top of your Page
Click on Save Changes
Note: You can always change any of this information whenever you want!
YOU’RE ALL SET!
Now your business page is good to go share it and keep it active!