

Home > Websites > E-commerce > Settings
SETTINGS TAB
Click on Build > Shop > Shop Settings


SHIPPING PROVIDERS
Click on Build > Shop > Shop Settings > Shipping Providers
The Shipping Providers refer to the shipping companies you may use when selling your products.
To activate a Shipping Provider, simply toggle on in the right side of each option.
You can activate as many Shipping Providers as you want - choose specific companies or choose the Generic option in case the company you wish to use is not on the list or you wish to be responsible for your own deliveries.
The ones you activate will be possible for you to choose when creating a Shipping Method.

Your Shipping will only be up and running once you have defined your Shipping Provider AND Shipping Method. Make sure that the rest of the shop set up is properly concluded before activating a Shipping Provider.
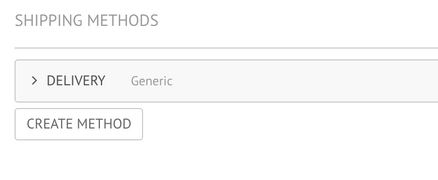
SHIPPING METHODS
Click on Build > Shop > Shop Settings > Shipping Methods
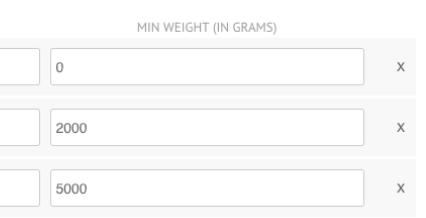
Shipping Methods allows you to create different methods of shipping which can be differentiated in price, weight and even shipping countries.
How to set a new shipping method?
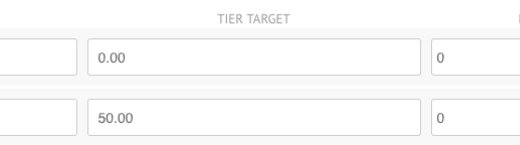
Click on Build > Shop > Shop Settings > Shipping Methods > Create method
Once you clicked the button Create Method a list of field to fill will appear.


PAYMENTS
Click on Build > Shop > Shop Settings > Payments
In Payments you can define which payment gateways or services your e-shop will support.
When you want to activate a payment gateway, simply toggle on in the right side.
SET UP PAYMENTS
In order to set up payments you must fill out the preferences related to the individual provider. Thus you must follow a different setup for each payment provider you are about to set up.
If you are in doubt about some of the fields contact the individual provider and ask them to help you find the things you need to complete.
If you have more than one language on your website, remember to fill out for each of the languages.
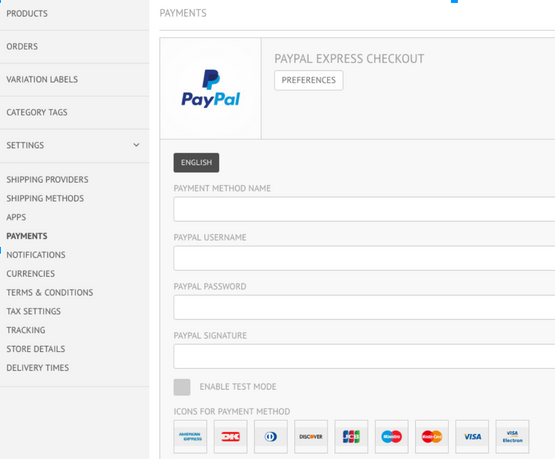
PAYMENT METHOD NAME
Often the consumer doesn't recognise the name of Payment Gateways and therefore might not know what payment option it is associated with. It is helpful to add a Payment Method Name that the consumer will recognise, i.e Credit Card instead of Sage Pay.
ICONS FOR PAYMENT METHOD
In some of the payment gateways - QuickPay, Midtrans, Paypal and Epay - it is possible to add one or more small icons which indicate the payment methods available, e.g. American Express, Visa, Mastercard, among others.
PAYMENT GATEWAYS
The current payment gateways supported by the editor are:
Paypal
Midtrans
Mollie
QuickPay
Stripe on Page Payment
Worldpay UK Payment
Payu Latam
Epay
Resellers can choose which payment gateway they want to enable in their account. It is an option to integrate towards additional gateways if these are compliant and have a publicly available API.
PAYMENT METHOD: MANUAL
This payment method refers to other payment arrangements agreed between the seller and the customer. Example, the payment can be done physically at the store, like a pickup in store arrangement.
PAYMENT METHOD: BANK TRANSFER
You can activate the bank transfer as a payment option. When doing so, when a client makes a purchase, the money will be transferred from their bank account to the shop’s bank account. All you must do is include your bank details such as swift code and IBAN.

SET UP TERMS & CONDITIONS
Click on Build > Shop > Shop Settings > Terms & Conditions
For both the seller and client’s legal protection, it is possible to add your own Terms & Conditions for your webshop in the editor. When making a purchase, your clients will be asked to accept these Terms & Conditions before proceeding to the payment of the order.
ADD REFUND POLICY, PRIVACY POLICY AND TERMS OF SERVICE
Here you have three different fields to fill out: (i) Refund Policy, (ii) Privacy Policy and (iii) Terms of Service. All you have to do is paste in each field the respective terms. If you have more than one language on your site you can customise your Terms & Conditions to each of them.
WHERE CAN CUSTOMERS SEE THE TERMS & CONDITIONS?
When purchasing a product, customers will be able to visualise the Terms of Service, Refund Policy and Privacy Policy in the following order: - in the first phase of the checkout flow, the Billing and Shipping page, where they are required to check that they agree with the Terms. The checkbox label is a link to an in-page pop-up with the Terms of Service.
Don’t forget to save your progress by always clicking on the Save button on the top of each page.

TAX SETTINGS
Click on Build > Shop > Shop Settings > Tax settings
In Tax Settings you can define whether you wish the prices of your e-shop to be displayed with or without tax, as well as manage different tax types.
DEFINE TAX BEHAVIOR
In case you wish to include tax in products’ prices, simply check the box before the option and click on the Save button.
OPTION ENABLED
When this option is enabled, the prices will always be shown with tax on the catalogue, products page and cart. At the checkout flow the price will be equally shown with tax and a separate line should show the amount of tax paid on that product or purchase.
OPTION DISABLED
When the option is disabled the prices will always be shown without tax on the catalogue, product page and cart. Only at the second phase of the checkout flow, in the Payment phase, will the product or purchase be shown with tax.
TAX TYPES
You will be able to define different Tax Types to the different languages your website supports. Remember that each language is associated with a primary currency.
By default you will see three different tax types. To edit them, simply click on top of the Tax Type you wish to modify and the field will expand with the different settings.
ADD NEW TAX TYPES
Click > Create Tax Type
Define:
TAX TYPE NAME
Make it easily recognisable since this would be the name displayed when choosing which tax to associate with each product.
PHYSICAL
If you are selling physical goods (books, clothes, etc) leave that box checked. Keep in mind that digital taxes are treated differently.
TAX RATE
By default, the tax is automatically calculated based on your store location and on the shipping address of your customer.
LABEL
Give a name to the tax with which you want it to appear in the checkout flow.
USE SPECIFIC RATE FOR TAX CALCULATION
It is possible to manually insert a specific rate for tax calculation. Once you have enabled the Use Specific Rate for Tax Calculation two new fields and a new option appear.
SPECIFIC RATE
Add the specific rate you want to associate with that Tax Type. You should write it in the format 0.000. So if you want to add a 25% tax, for example, simply type down 25.000.
The editor calculates the tax rates automatically as long as you define the kind of product you are selling. All you must do is define the product type - physical goods, digital goods or events, when creating your products on the editor.

STORE DETAILS
Click on Build > Shop > Shop Settings > Store Details
In this section you can add the most relevant information about your business, including address and contact.

DELIVERY TIMES
Click on Build > Shop > Shop Settings > Delivery Times
In this section you are able to add and customise shipping intervals for your products.
By default, three intervals will be created in your Delivery Times. It is also possible to customise delivery times for individual product variants.
You can always go back and add or edit delivery times. Don’t forget to save your progress by always clicking on the Save button on the top of each page.